


Description
Metal Laundry Chute Door: Sleek Design, Lasting Performance
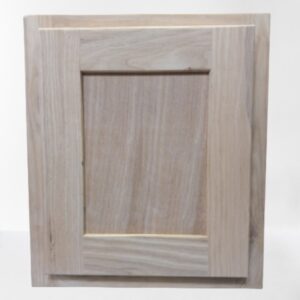
Upgrade your home with a metal laundry chute door. Easily manage your laundry duties with a clothes chute door that is crafted from high-quality, durable metal for long-lasting performance.
Metal Clothes Chute Door Features:
- Modern design: Adds a touch of elegance to home.
- Durable metal construction: Built to withstand everyday use.
- Smooth, easy-open hinge: Makes loading clothes a breeze.
- Standard size (9×12): Fits most common laundry chute openings.
- Easy installation: Includes clear instructions and mounting hardware for a quick and hassle-free setup.
Why Order Laundry Chute Doors (Metal) from Fast Shipped Filters?
Order your metal clothes chute door today and enjoy the convenience of a stylish and functional laundry solution! When you order from Fast Shipped Filters, we provide FREE shipping to orders within the USA! We also ship the same day on all orders placed before 11:00AM EST. Contact us if you have any questions about your order of clothes chute doors (metal).
Installing a Metal Clothes Chute Door
Tired of carrying laundry baskets up and down stairs? Consider installing a metal laundry chute for effortless laundry collection across multiple floors.
Before You Install a Clothes Chute Door (Metal)
Before you grab your tools, there are crucial steps to follow. This guide will walk you through the process, but remember, some communities have strict fire codes that prohibit or limit the installation of laundry chutes, especially those that are two stories tall and present an unobstructed pathway for smoke and fire to spread. Check with a local building inspector before starting the project. For a smooth and safe installation, consider consulting a qualified professional.
Required Tools and Materials:
- 4-in-1 screwdriver
- Drill/driver (cordless)
- Drywall saw
- Reciprocating saw
- Tape measure
- Taping knife
- Tin snips
- Utility knife
- Drywall and drywall accessories
- Duct tape
- Laundry chute door
- Metal duct
- Paint and primer
- Sandpaper
- Sheet metal screws
By following these simple steps and utilizing the necessary tools and materials, you can effortlessly enhance the functionality of your home with a metal laundry chute. Say goodbye to tedious trips between floors and hello to a more efficient laundry routine.
Begin Metal Clothes Chute Installation
If you live in a house without a clothes’ chute, you’re probably sick and tired of running up and down the stairs from your bedrooms and bathrooms to your laundry room, toting baskets of dirty clothes and towels. Installing a laundry chute door can be a breeze if you have an unobstructed path between the two floors — or impossible if you encounter wires, plumbing or other obstacles. If you can find a suitable location, consider a metal laundry chute!
Step 1: Locate the Ideal Position
Find a suitable wall without obstructions for your laundry chute. Typically, a hallway is the perfect location. Use a stud finder to identify two studs and bore a small exploratory hole to ensure there are no hidden obstacles. Installing a laundry chute door can be a breeze if you have an unobstructed path between the two floors—or impossible if you encounter wires, plumbing or other obstacles.
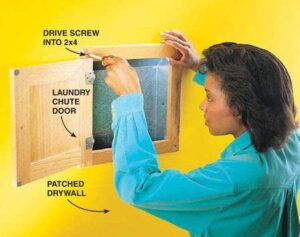
Open the wall for the chute by carefully removing the baseboard, then using a utility knife to cut out a chunk of drywall 42 in. high down the center of each stud. Use a reciprocating saw or handsaw to cut out the baseplate between the studs. Work the plate out carefully; the drywall and the trim on the opposite side might be nailed to it. Then cut a hole through the plywood floor for the duct to slide through. At the top of the cutout, install a 2×4 piece of blocking between the studs as a nailing surface for the frame of the laundry door.
Step 2: Assemble and Insert the Metal Duct
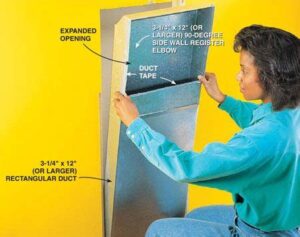
Assemble and insert the ductSnap the rectangular duct pieces together and use metal-cutting snips to expand the opening in the 90-degree elbow so it’s just slightly smaller than your laundry door opening. Trim and fold over the opening flap that you cut, then install the chute. Using sheet metal screws, attach the duct to your top blocking and the studs on each side. Duct-tape the joint between the two pieces on the inside and on the edges of all openings so clothes won’t snag on sharp edges.
To make the chute, use ordinary 3-1/4 in. x 12- or 14-in. galvanized heating duct. You’ll also need a 90-degree elbow with a 6-in. register opening and a preassembled laundry chute door. These materials are available in the plumbing and heating sections at most lumberyards and home centers.
Reviews
There are no reviews yet.